To identify the correct mechanical seal, start with the pump rather than the appearance of the old seal. Confirm the pump identity, original reference, seal construction, critical dimensions, and actual application before ordering. Older pumps may have modified sleeves, glands, or aftermarket seals, so no single photo, diameter, or catalog entry should control the final decision.
A Reliable Identification Process
Use the following sequence whenever you need to identify a mechanical seal replacement for an existing pump. Each step checks a different part of the evidence, reducing the risk that one worn dimension, misleading photo, or outdated reference leads to the wrong replacement.
- Identify the pump manufacturer and complete model.
- Record the product number, serial number, and production code.
- Find the seal model, OEM reference, service-kit number, or historical spare reference.
- Identify the general seal construction.
- Confirm the shaft or sleeve diameter.
- Confirm the complete stationary seat.
- Confirm working length and key rotating dimensions.
- Cross-check the fluid and operating conditions.
- Compare the candidate replacement drawing with the actual pump and old parts.
- Resolve any conflicting information before ordering.
This process uses independent evidence rather than one clue. It also creates a repeatable identification method for purchasing teams and repair technicians. The detailed sections below explain how to check each part of the process.
Start With the Pump, Not the Seal Photo
A seal photo can narrow the possibilities, but many mechanical seals look almost identical. Similar springs, retainers, rubber bellows, and face shapes may appear across different shaft sizes and pump families. Therefore, identify mechanical seal candidates from the equipment first whenever pump information is available.
The pump can provide a stronger reference because manufacturers often connect spare parts to a complete model, product number, serial number, or production code. However, pump identity is not enough by itself. The installed seal must still be checked against the actual machine, especially after previous repairs.
Step 1: Record the Complete Pump Identity
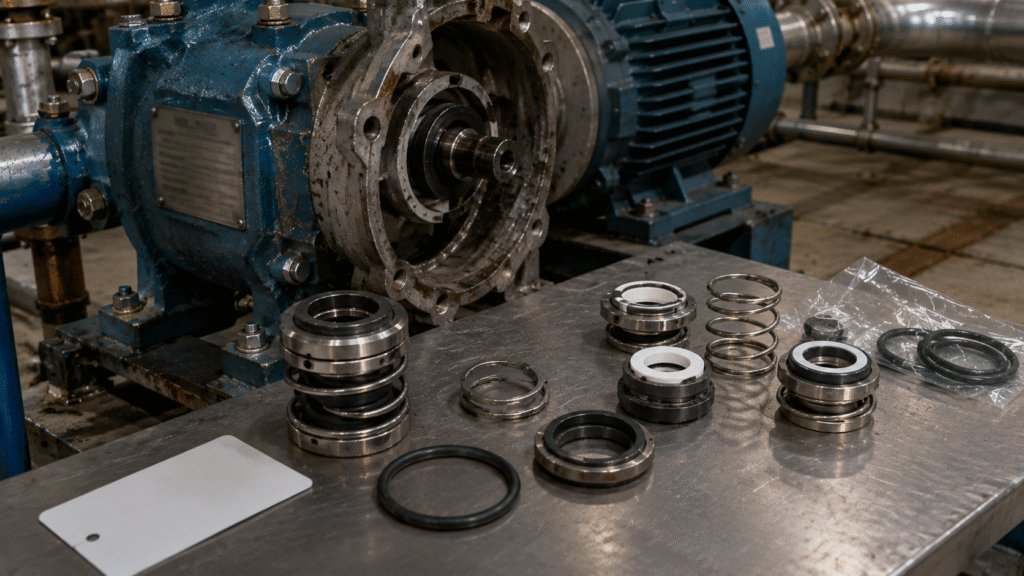
Record the full pump manufacturer and complete model exactly as shown on the nameplate. In addition, capture the product number, serial number, production code, and motor size when those fields help distinguish variants. Do not remove suffixes, letters, or revision information from the model.
For example, one pump series can contain several seal configurations. Motor size, production year, regional version, shaft diameter, material option, or previous modification may change the required replacement. Therefore, a partial model number can lead to the correct pump family but the wrong seal.
When documentation is available, a pump nameplate product number or serial-number documentation search can lead to useful spare-parts information. Still, compare that reference with the current pump and removed seal, because the equipment may no longer match its original factory configuration.
Step 2: Look for an Original Reference
Next, check the removed seal, pump documentation, maintenance records, and previous purchase history. Useful references may include a seal model, OEM reference, service-kit number, engraving, spare-part drawing, old supplier quotation, or maintenance work order. Keep every reference exactly as recorded for later comparison.
A reliable reference can identify mechanical seal replacements faster than photographs. However, an old reference may describe a previous configuration. The pump could have received an aftermarket conversion, different shaft sleeve, modified gland, or non-original seal during an earlier repair.
Therefore, cross-check any reference against the pump identity and physical components. If the reference and actual seal disagree, treat that conflict as useful evidence. A mismatch can point to a modification, incomplete record, or different production version of the pump.
Step 3: Identify the General Design
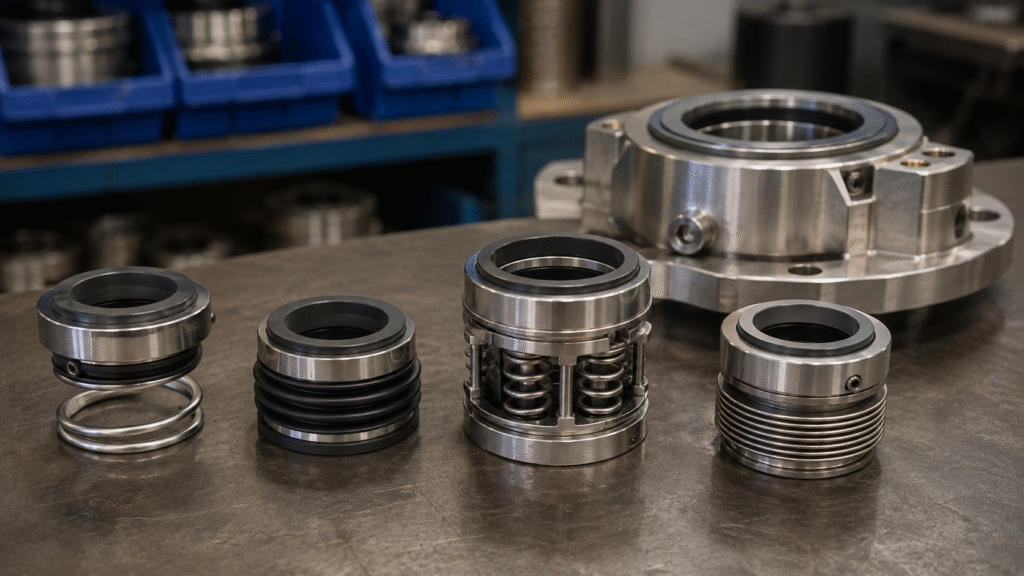
The general construction helps narrow the candidate family before dimensional confirmation. Determine whether the removed assembly is a component or cartridge seal. Then note obvious features such as rubber bellows, single spring, multiple springs, metal bellows, and whether the pump uses a single or dual arrangement.
However, keep this step simple. The goal is not to write a seal-type specification from scratch. Instead, construction tells you which replacement families deserve closer comparison and which dimensions or drawings matter next. Structure is a filter, not the final identification.
For example, a cartridge assembly requires gland and sleeve compatibility, while a component seal depends strongly on installed position and working length. Likewise, a rubber-bellows seal should not be matched only to another seal with a similar rubber profile or spring shape.
Step 4: Confirm Critical Dimensions
Next, once the likely family is known, confirm enough dimensions to separate similar candidates. At minimum, record the shaft or sleeve diameter, key rotating-assembly dimensions, stationary-seat dimensions, working length, and gland or cartridge dimensions where relevant to the installed pump design.
Do not turn this identification step into a full measuring procedure. The dedicated mechanical seal measurement guide explains how to measure the rotating component, stationary seat, free length, working length, and cartridge features accurately when more detail is needed for confirmation.
Dimensions should support the pump and reference information rather than replace them. A shaft measurement may identify several possible seals, while the seat and working length can eliminate incompatible options. To identify mechanical seal replacements reliably, use several dimensional checks together.
Why the Stationary Seat Matters
Many purchasing mistakes happen because only the rotary seal and shaft diameter are checked. However, the stationary seat is part of the sealing pair and often determines whether a replacement can actually fit the pump. Ignoring it can make a convincing rotary match unusable.
In addition, confirm the seat outside diameter, inside diameter, thickness, and mounting style. A replacement rotating assembly can look correct and slide over the shaft while still being incompatible with the existing seat bore or axial position. Seat geometry can separate otherwise similar candidates.
Therefore, identify mechanical seal replacements as complete rotating-and-stationary sets whenever possible. If the old seat is broken, keep every fragment and record the pump bore or gland details. Even damaged pieces may preserve useful geometry, mounting information, and seat profile details.
Check for Pump Modifications and Conflicting Evidence
Older pumps may no longer use their original factory geometry. A replacement shaft sleeve, machined shaft, converted gland, non-original seal housing, custom spacer, or altered impeller position can change the seal arrangement without changing the pump nameplate.
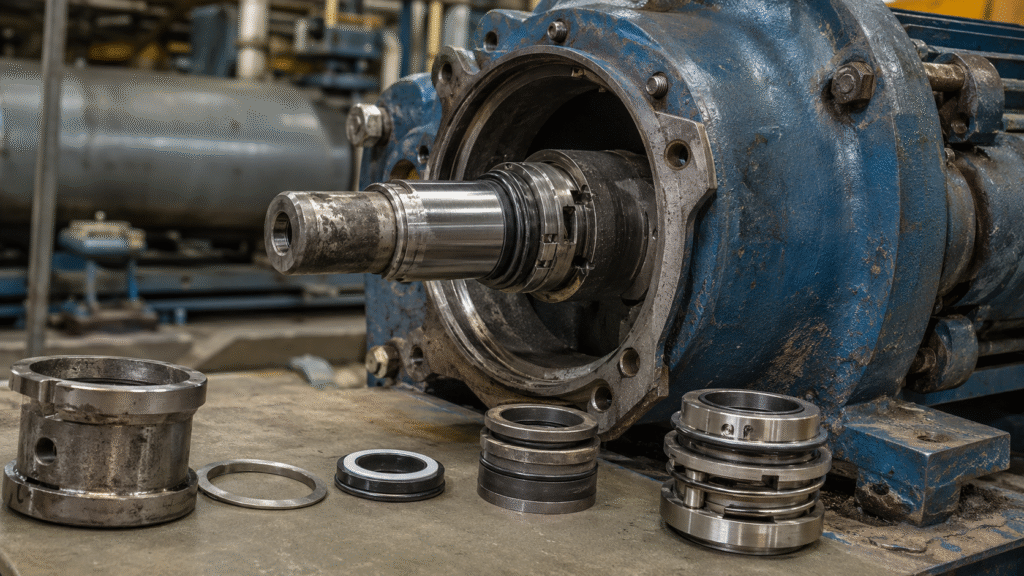
Previous repairs may also have introduced an aftermarket seal, adapted size, custom spacer, or components from another configuration. If the pump model, parts list, old reference, and current seal disagree, stop an automatic catalog order. The conflict may indicate a modification, incomplete record, previous incorrect repair, or different production version.
First, verify the complete nameplate and serial number. Then compare the shaft size, stationary seat, working length, installation position, and old reference numbers. Review maintenance records for sleeve replacement, machining, gland conversion, spacer changes, or previous aftermarket seal installation.
Do not force the physical pump to match old documentation. The correct replacement for today’s machine is the option that best agrees with the equipment identity, installed geometry, historical reference, and current components.
Cross-Check the Application
After geometry is confirmed, make sure the candidate seal is suitable for the service. Review the pumped fluid, temperature, pressure, shaft speed, solids, corrosion risk, and lubricity. These conditions can change face materials, elastomers, and sometimes the seal arrangement or support requirements.
However, this article is not a complete application-selection guide. Use the mechanical seal selection guide when the question changes from “Which seal is installed?” to “Which design and materials should this application use?” That keeps identification separate from full engineering selection.
This distinction matters because identification establishes what physically fits and what configuration the pump uses. Application review confirms whether that replacement remains appropriate. Therefore, identify mechanical seal geometry first, then verify that its materials and arrangement still suit the process.
What If the Old Parts Are Broken or Incomplete?
First, do not throw away damaged components. Keep the rotating face, stationary seat, spring, retainer, rubber parts, drive pins, washers, clips, and any marked pieces. Even broken parts can reveal dimensions, construction, material clues, and assembly relationships that support reliable identification.
Lay the components out by their original order when possible. Then combine the remaining parts with the pump model, reference numbers, shaft size, seat dimensions, and working length. This can identify mechanical seal families even when the original assembly cannot be reconstructed.
If you need to send the evidence to a supplier, the guide on information needed to identify a seal covers photographs, markings, dimensional records, and inquiry preparation. This article stays focused on deciding what the seal is and whether it matches the pump.
Common Identification Mistakes
The first mistake is identifying from appearance alone. A visually similar spring or rubber profile does not prove compatibility. Another common error is selecting by shaft diameter only while ignoring the stationary seat, working length, installation position, or pump variation.
Incomplete model numbers also cause problems. Missing suffixes can hide differences in production version, motor size, material configuration, or shaft arrangement. Likewise, assuming the removed seal is original can repeat an old repair error instead of correcting it during identification.
Finally, keep parts from different pumps separated. Mixing seats, springs, washers, and rotating components can create a false combination that never existed in the equipment. Label removed parts before several similar pumps are dismantled in the same workshop or service area.
Mechanical Seal Identification FAQ
Can the Pump Model Identify the Seal by Itself?
A complete pump reference may narrow the choice to one known spare part, but production variants and previous modifications can change the installed seal. Confirm the stationary seat, old components, or critical dimensions before ordering whenever uncertainty exists.
Is Shaft Diameter Enough for Replacement Identification?
No. Many unrelated seals use the same nominal shaft diameter. Confirm the stationary seat, working length, rotating dimensions, construction, and installation arrangement as well.
Which Is More Useful: a Reference or a Photo?
A reliable OEM or seal reference is usually more specific than appearance alone. The strongest identification combines that reference with the pump identity, physical components, critical dimensions, and current installation geometry.
What Should I Do if the Old Seal Has No Markings?
Start with the pump nameplate and maintenance history, then identify the construction and measure the critical dimensions. Keep the rotating and stationary components together because their geometry can still narrow the replacement family.
Do I Need to Know the Seal Materials to Identify It?
Material information can help distinguish variants and confirm application compatibility, but it should not replace geometric identification. Once the configuration is known, verify that the faces, elastomers, and metal parts remain suitable for the current fluid and operating conditions.
To identify mechanical seal replacements reliably, do not depend on one photo, one diameter, or one catalog entry. Start with the pump, find a trustworthy reference, classify the installed construction, confirm the stationary seat and working length, review modification history, and resolve conflicting information before ordering.